This was such a cool project. The one I made above is a super simple version, but there are endless possibilities to embellish these little tea toppers. I know I said I was going to make a cozy, but I thought this was much better....and cuter.
I took a few days off for two reasons. One, I needed to do some research...
This is just one example of my research. I was trying all kinds of embroidery techniques and ideas just to get a direction in which I wanted to go. You should have seen my drawings. I'm really happy that my other research on the web and other blogs led me in the direction I am going to go. There will still be some embroidery on some others, but those are for other posts - just to keep you interested.
Two, I needed to sleep. This little peanut inside has been keeping me up all night long and I needed to rest and just think about what I was going to do.
This has led to success in my mind. I have a firm idea of the direction I'm going to go and I'm going to make nine tea toppers. One will even be for a male. Mr. J down in the lobby of our building is a tea drinker!
So, to begin. I needed to make a fabric flower and I didn't know the first thing about them so my research led me to another blogger,
Sew Itsy Titsy. This is where I found my tutorial on the flower, which was super easy.
First, I picked two fabrics for the flower to coordinate to my yellow felt (I'm using firm felt). I used a piece of Glad Tupperware for the pattern to cut out four circles on each of the fabrics.
Next, iron down the middle of the fabric to get a nice crisp line for the center. I tried to skip this step...don't.
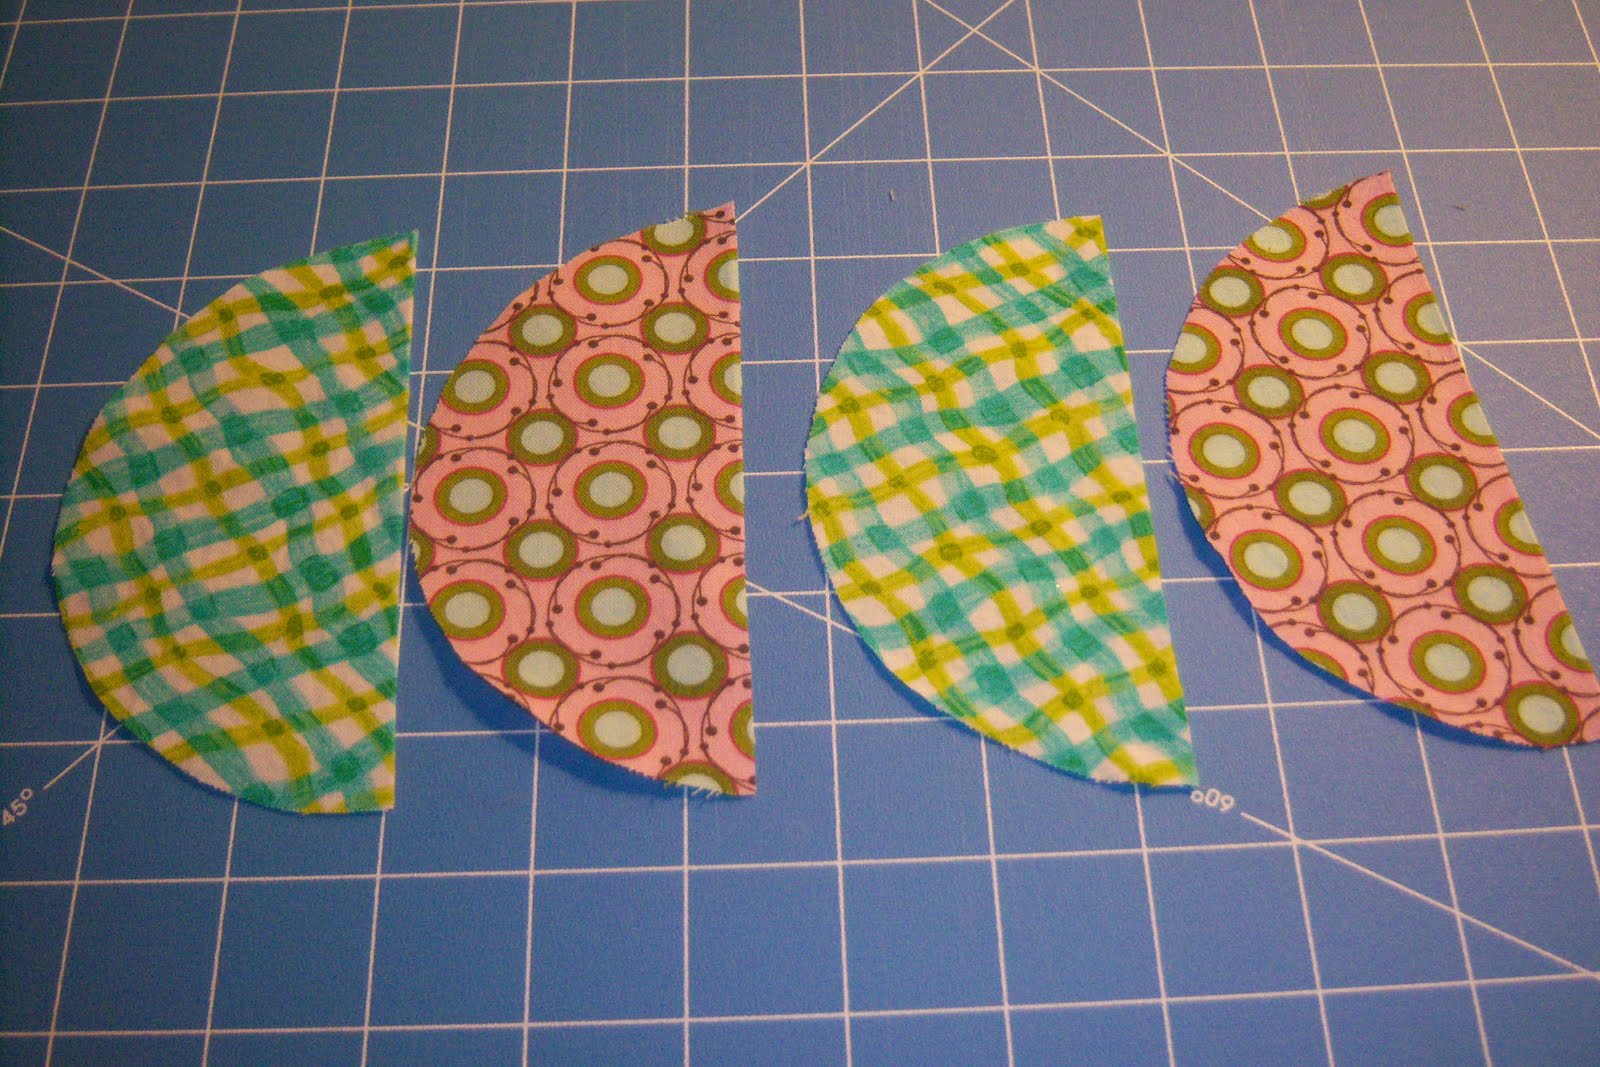
Use a ruler and rotary cutter to cut down the center of the fabric, now you should have two half circles.
 |
| Remember, I had four original circles per fabric. |
The next part was fun. I folded the half circles in half with right sides facing. I then sewed a 1/4" stitch down the flat side. Then without stopping or cutting the thread, I fed the next folded half circle into the machine.
The result....
A pretty little petal necklace!
This is what the connection should look like.
Cut the thread that connects the petals and turn them inside out, making sure to make the nicest point possible. I don't have a point turner so I used a color pencil that was pretty blunt on the sharpened end.
 |
| This gave me a great idea for Grace's next birthday! |
Next, flatten one of the petals and using needle and thread make a running stitch along the curved bottom of the petal.
 |
| I found it easier to have my seam on the side. You don't even see it in the end. |
Next, take the other patterned fabric and do the same. You will continue to alternate until you have the amount of petals you want (if you want more than what I used, you will need to cut extra circles in the beginning). I used 8 petals for the bottom flower.
 |
| 8 petals - bottom flower |
Once you have gotten all the petals on the string, pull tight and secure with a few backstitches. The tutorial said to leave an 8" string, but I forgot. It all worked out though.
For the top flower, you do the exact same thing, just using less petals. I used 6 for the top flower. This left me with one petal left over. It will be my little hat, lol.
Don't cut the string once you have made your backstitches. Instead, start threading through both flowers to secure them together. It doesn't need to be perfect, just enough that there is a secure hold.
Again, you are supposed to leave the string to 8" here. Again, I forgot.
Next, I needed a button. I have a million buttons but nothing was making me happy so I figured, let's make a fabric button. I don't have a button maker so I had to find a tutorial and once I did, I was feeling pretty silly because it's really, really, really simple and I should have just figured it out myself.
First, choose your button. I didn't have any flat buttons so mine is pretty round. But it needs to have a shank.
Next I chose a contrasting fabric and cut out a small square. With the button in the middle, I measured the distance from the shank to the button edge.
Next, I placed the ruler on the outside of the button and made some dots around the perimeter so that I could sketch a circle.
Just a note: This method is perfect for a flat button. However, my button is extremely domed. If you use a very domed button, add a couple of centimeters.
Next, I cut out the pattern and made a running stitch along the edge of the fabric.
It gets really simple from here...just pull.
Pull very tightly and then use a few backstitches to secure (Or, you can leave a tail at the beginning and end of your running stitch to tie them together into a secure knot - your preference).
Using your needle, make sure that your shank is unobstructed.
Next, attach the button to your flower.
 |
| So Pretty!!! |
To finish, the flower needs a backing to firmly secure it to the felt so cut out a small circle that is large enough to cover the back of the flower, but small enough that it won't be seen under the flower.
Secure it with fabric glue - I didn't have any but I will tomorrow! My tacky glue will suffice for this demo.
 |
| I see baby bows in my future!! |
Next, if you haven't done it already, cut out two circular felt pieces. I used the same Glad Tupperware bowl that I used for the flower pattern. It turns out to be 4 7/8" wide. This is a perfect size for me because my mugs are really wide. You could of course make them smaller but since I don't know what all my tea topper recipients use for mug size, they are gonna get the one-size-fits-all version.
Since the firm felt is hard to fold, cut out two squares and cut them together to get two uniformed circles
Stack and glue those babies together!
Next, glue the flower to the topper and PRESTO!!!! You have a beautiful Tea Topper to use when you want to steep your tea. Or, if you are a super slow coffee drinker, place it over your coffee to preserve the heat. Great gift!
This was such a fun little project and really cute. It was also a quick gift to make. By the time I am completely finished with this post, I probably could have made four or five so imagine the possibilities for birthdays, holidays and just the random gift giving moment.
Again, this particular one is pretty simple because the flower is so much the focal point. I'll be making more with other embellishment options so stay tuned!!!