When I say I haven't touched my coat closet since we moved to Cincinnati back in December of 2012, what I really mean is I have consistently piled more stuff in there than humanly possible since then. So much stuff that I found all kinds of hidden treasures that I previously considered lost. Score!
It was a pile of crap mixed in with regularly used items and you couldn't even see the floor because of bags and shoes. It was by far the worst space in my home - although all the closets need a good work out. Not only is it the worst, but it's the most used...which is why it was the worst! I finally broke down and said,
"THAT'S IT! IT'S CONSTRUCTION DAY!"
My husband hates it when I say that, because he knows I'm about to make a mess...and somehow I'm going to rope him into it. Sorry hun!
So, in my break-down-haste, I forgot to take a picture of the dreaded beast that was my closet...however, I took a picture of the damage it made to my adjoining kitchen.

Mountains of ties...that Mr. MCD all of a sudden realized he liked...again.

Hats, mattress pads, and a bag. Don't let that bag fool you...it is full of meaningless crap and pens and crap and CRAP! And it wasn't all neat and in a bag. Oh, the deception, THE LIES!

A Tupperware full of silverware...lol. All kinds of gadgets and gizmos a plenty (see what I did there). Old remotes, car chargers, and paper and CRAP!

So much CRAP!
Okay, so on to beauty and function and a lot less crap.
After I cleared her out, she looked so clean and minimal and I really wanted to keep the closet like that but I need room for coats, gloves, scarves, shoes, bags, cameras...okay...crap.

There was actually a second shelf right above the clothing rod and another shelf above that one that you can barely see. I had already started adding stuff like the brand new shoe rack down at the bottom by the time I realized I needed to take pictures. Hello!! Blog about it lady!
So on the agenda was to move the clothing rod up to the top shelf, change out the old closet shoe organizer for a hanging nursery organizer I had in Grace's room but really wasn't using. This one, by Munchkin, has mesh pockets on the side and multiple sized cubby holes, in which I placed three fabric bins I already had.


I love the organizer. At the top of it, I have all of my wristlets, which are switched and used all the time, and even some of my evening bags. The next meshed cubby at the top has all the girls' gloves. The divided cubby has pull-ups for C-bear on one side and my camera and camera case on the other with room to spare should I need it. In the bottom three cubby's are hats and scarves for the whole crew. The side mesh pockets hold mommy's and daddy's gloves.
I also attached hooks that I already had on hand in a V pattern on the side. The bottom is for G's preschool backpack, from this post. The top two are currently holding a scarf and two light jackets for the girls.
The over the door shoe organizer was already there but definitely got a make-over and doesn't just hold shoes. It holds dance gear, headbands and bows that don't make it upstairs to the bow holder. And it also holds toiletries like deoderant, chapstick, sunscreen and even a hairbrush for the girls with hair ties. It works so well for getting ready for the gym and school as I generally unpack our bags after every outing because I used different bags for different purposes and need different things in each.

The other side is just as functional!

I got another set of hooks for small items and in the back is a towel bar from Ikea with clip on plastic hooks. The plastic hooks work for now but I think I am going to use something a bit sturdier like a regular s hook. However, it holds the two rain coats and one of my small hand bags for now with room for more.
 |
| That one random shoe...Don't ask where the other one is. The closet probably ate it. |
Shoe storage!!! The girls have already formed the habit of taking off their shoes and putting them in the closet. However, they just threw them in...there was nothing else to do so I can't blame them. So now I have to break them of that habit and turn it into putting them on the new, pretty shoe rack...*sigh*
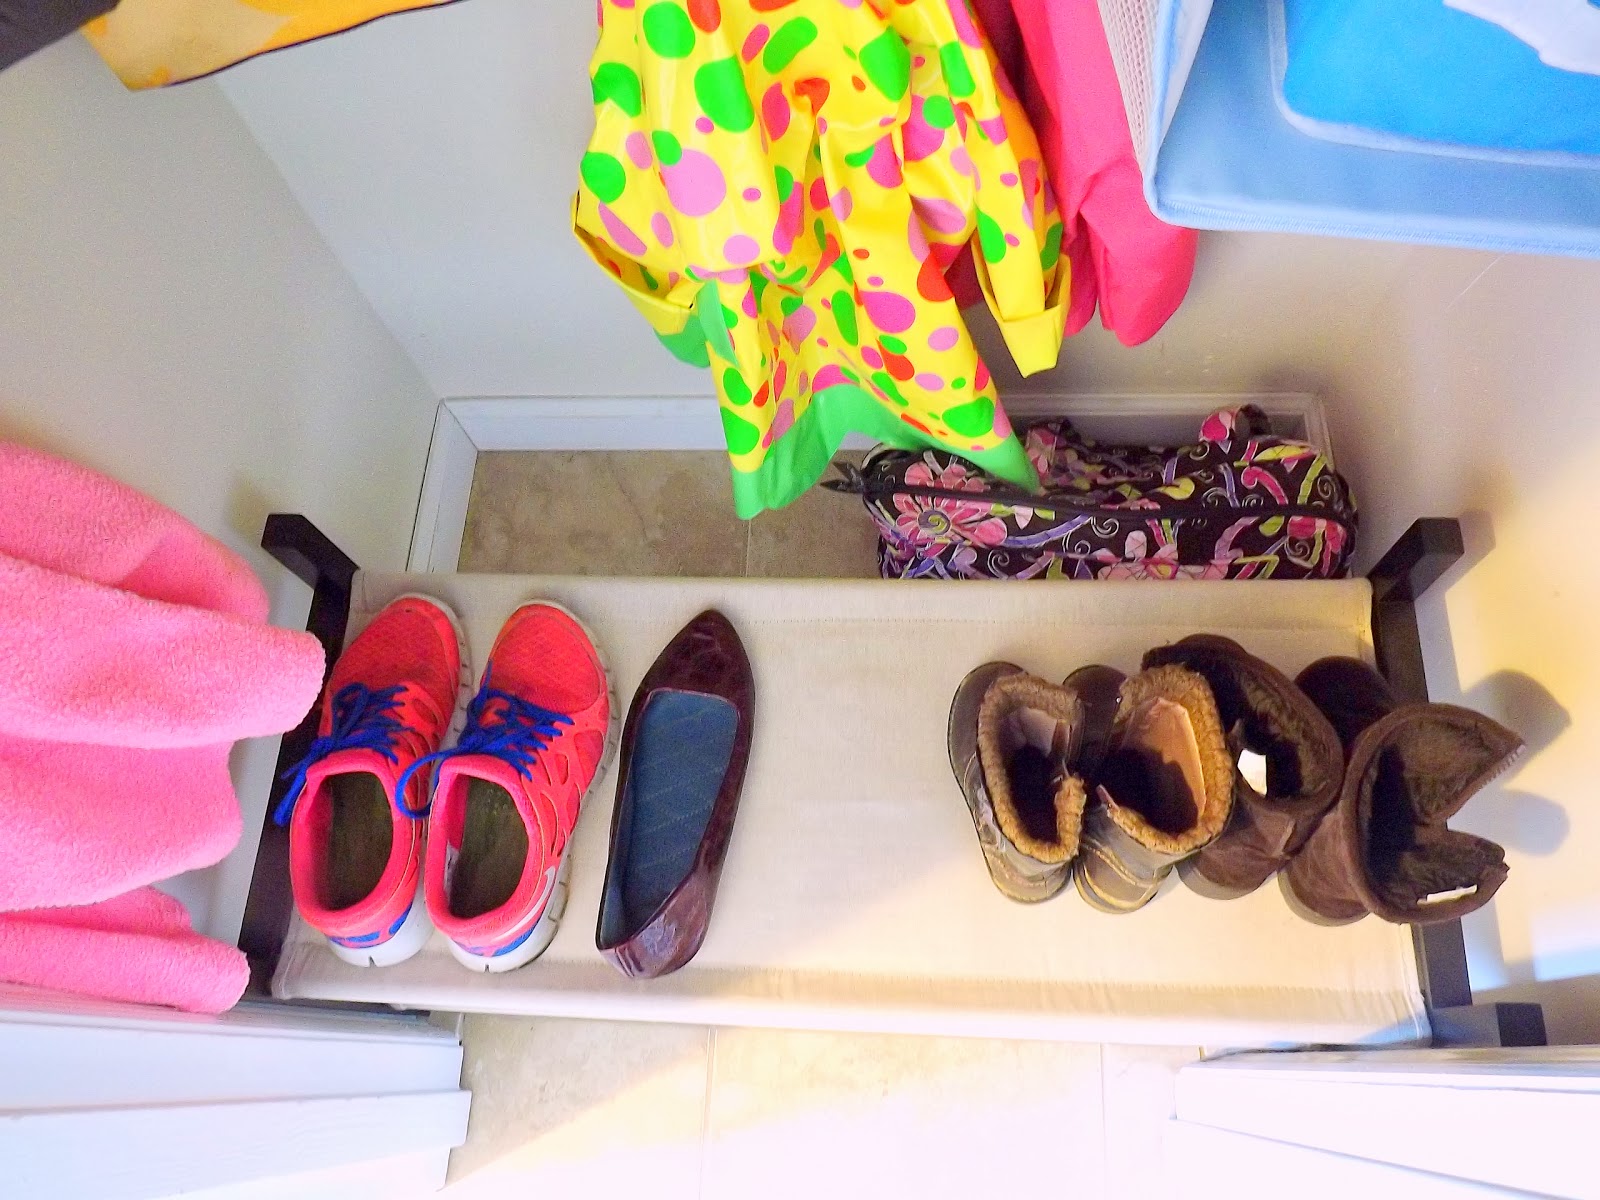
Behind the shoe rack is the perfect amount of space for one of my large diaper bags and another bag (like my diaper backpack) to sit comfortably and out of the way. GENIUS!!!

And at the top...another bag, a purse and bucket full of grocery bags! Clean, uncluttered, functioning beautifully...this make me happy.

Sorry for the lack of a full on frontal but...it's a small hallway and I wouldn't be able to get all of it. But trust me when I say...it's sooooo much better. Even Mr. MCD keeps opening the door and saying..."I can't believe how much of a difference this is." He especially loved my idea to raise the clothing rod, which truly did make all the difference in the world. By utilizing the vertical space, I made the closet not only look bigger, but increased the usable square footage at the bottom.
Oh...and a little extra something I did for myself. When we are leaving or have just gotten back from an outing, I don't put my bag away right away because, as I've mentioned, I like to completely empty the bag. However, I'm tired of having to place the bag on the counter when packing or unpacking and also having it linger on the floor while in transition.
Well, problem solved...

That little beauty of a hook is reinforced with some heavy duty toggle bolts so it's not going anywhere and believe me, that's good because that awesome backpack is pretty heavy at times. It's the perfect spot; out of the way but within our regular traffic pattern. Love!
Very cheap makeover for me. I didn't have to buy anything but, if you had to build your closet space from scratch but as affordable as possible you could make your closet look bank for under $100.
If you would like some closet organization ideas, contact me and I would be happy to provide a detailed layout and price sheet for your project.
Until next time...