

Have you ever had one of those moments where you are doing something or looking at something and then this big idea hits you and you have to stop everything you are doing and just focus on that? That is why this skirt exists.
While looking through a box of old clothes that I keep for up-cycling purposes I ran across and old maternity shirt. I was going through the box for a completely different project but when I saw the shirt I was overcome by the "Do It Now" syndrome that I have a tendency to let control my life.

It's beaten, bruised and sad. I wore this quite often while preggo with both of my children. I loved the soft fabric and the stripes looked great under a maternity cardigan. It was also a favorite sleeping shirt. It has seen it all. But when I saw it I was thinking two things...
1. I bet Izzy would wear this!
Izzy is the female pirate from Jake and The Never Land Pirates
2. Grace wants to be a pirate for Halloween!
We have been discussing the costume options with Grace and it always comes back to Jake and The Never Land Pirates. She keeps telling me that I can be Izzy, Daddy can be Cubby, She's Jake and Claire can be Skully....the parrot...
I'll admit, I've really been contemplating the idea of making costumes for the whole gang...even a parrot costume for Claire bear.
So, for the next hour after finding the shirt, I made a simple skirt that maybe she could use for pirate dress up too. Who knows.
First and foremost, Grace had to confiscate and check out the original shirt.
After I finally convinced her that it would be much cooler as a skirt, she finally let me have it.
So here is how an old maternity shirt became a soft and cute fringed skirt.
So here is how an old maternity shirt became a soft and cute fringed skirt.
First, gather your materials. You will need:
1. Striped shirt that you would like to up-cycle.
2. Good fabric Scissors
3. Sewing Machine
4. Appropriate Sewing Needle
4. Matching thread
5. Elastic (1/2 inch wide or less will do) cut to desired length
6. Pins
7. Two Safety Pins
8. An hour of time
I want to take a moment to stress the importance of number four. My shirt was a stretchy, knit jersey fabric. And if you happen to use a similar fabric, be sure to use the appropriate needle as you could damage the fabric and your machine. I went with a knit needle for lightweight fabrics. Worked like a charm...smooth like buttah!
Also, my rule of thumb for cutting elastic is to cut one inch less than the required length. Grace's waist was 19 3/4". So I cut a piece of elastic 18 3/4" long.
So here we go!!
First you need to cut the fabric to ensure a perfect "tube". Since my shirt was a maternity shirt, this was really important. I had more fabric in the front than in the back, naturally. If you are using a regular shirt, you could simply use the hem as-is or cut along or above it depending on the length you want.
I wanted a longer skirt so I found the first stripe that went around the entire shirt and cut along the bottom of it.

Next, I did the exact same thing to the top, finding the first stripe that went all the way around unhindered by any hems on the shirt. Again, I cut along the bottom of that stripe.

Once you have cut out your piece, you should have a "tube" of fabric.

My fabric widened near the bottom as it was a maternity shirt. Therefore, I chose that part as my bottom and started working on the top.
For the elastic waistband I made a casing. After turning the fabric inside out, I suggest you make a hem by folding 1/4 of an inch, iron that down, and then fold over again an inch (you can also use one of the stripes as a guide). Pin along the bottom of the hem.
Next, Take two pins and mark the opening to your casing on a side seam or on the back of the skirt. You will not sew this area to begin with and the pins will act as a start and stop point.
Creating a hemmed casing makes for a cleaner and more professional garment. However, I had length working against me so I had to sacrifice the pretty hem. : - (

Next you will start at one of the opening pins and sew along the bottom of the casing using an overlock or zig zag stitch for stretchy knits, or a straight stitch for non-stretch fabrics. Remember that when you start, sew a few stitches and then make a few back-stitchs before proceeding.

When you come to the other pin, make a couple back-stitches to secure the thread. This opening will need to be secure when putting in the elastic.
Now you will want to insert the elastic, and I have a couple tricks.
First, place a safety pin on the end of your elastic. This will be the end that you feed into the casing.

On the other end (making sure to keep the elastic untangled and straight) pin the elastic to the outside of the casing. This keeps the end of the elastic from slipping into the casing when you are tugging it through. Brilliant!!

After you have pulled the elastic through the casing to the other end, pin the two ends of elastic together and sew. Use a zig zag stitch and go over it a few times to ensure a secure hold.

Next, sew up the hole in the casing. If you catch the elastic, that is perfectly fine and will actually help it to stay in place.
After your top is finished you can start on the bottom fringe. I fashioned the bottom with those fleece throws in mind. Basically it is simply tying two strips of fabric together.
First start by cutting about 1" into the fabric and make the strips about 1/4" wide. I used the bottom of one of the stripes as a guide.

Continue to cut until you are about two inches from your starting point. This will keep you from cutting one too many strips and not having anything to tie it to.
Tie two strips together in a double knot and continue until you get to the two inch block. From there you can eyeball it to cut the correct amount of strips to ensure everyone gets tied to a partner.

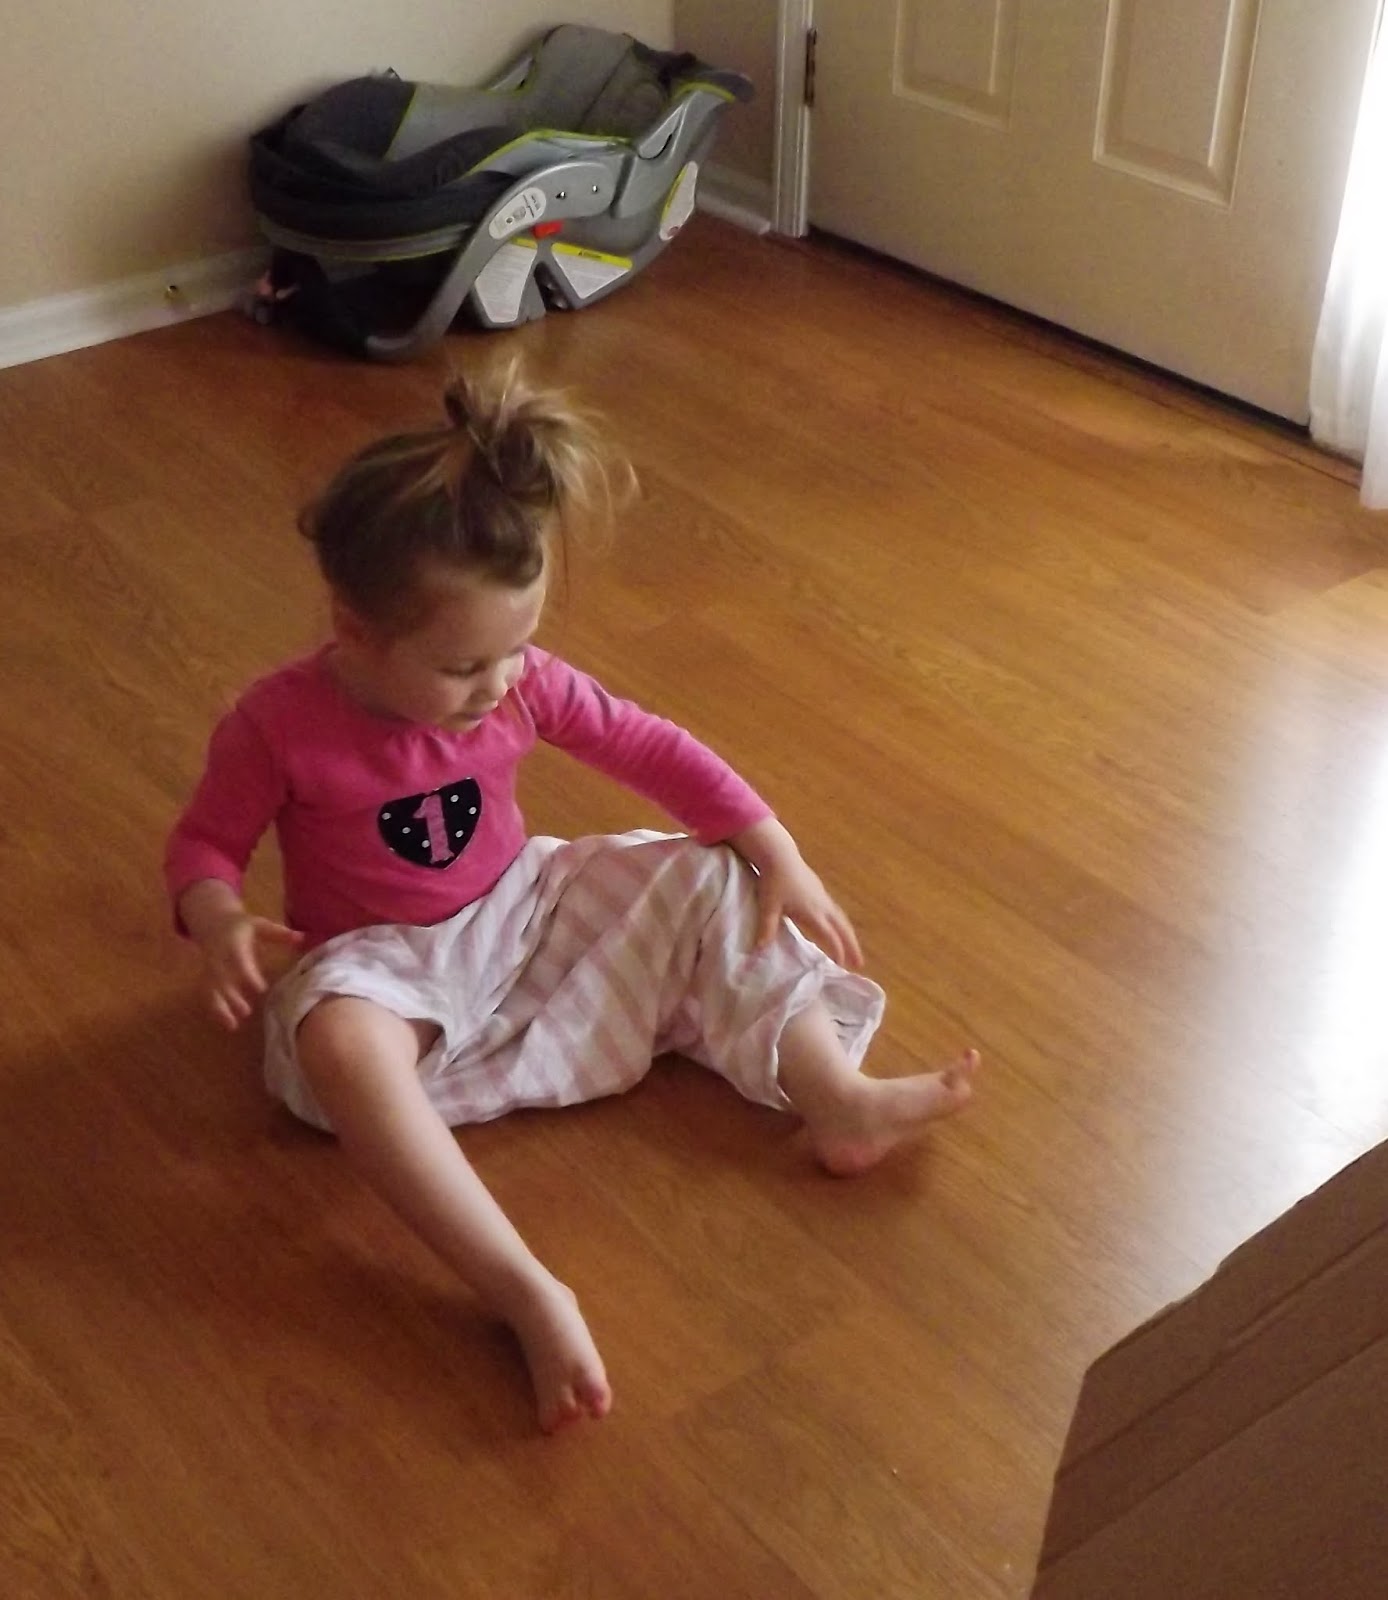
And then you are done. All that's left to do is bribe your daughter with a piece of chocolate just so you can take a picture of her wearing the skirt!

After she put it on she of course loved it. I made no mention of Izzy and the other pirates. But I can definitely see this with some tights, a vest and a pirate hat. Can you? I'd love to hear what you think.

me. I had the thread and everything else so this project was great! Plus, it only took me an hour and that was with both babies running around and Grace repeatedly asking me, "Is it done yet?"


I really love this skirt. It's loose and the fringe at the bottom adds just a little more visual interest. Here's the before and after:

Now go dig through your old shirts and find one to make into a skirt!
Until next time...

1 comment:
This is brilliant! I love up-cycling. You did a great job! I always read your posts thoroughly!
Today, I plan to get my knitting loom out and make a baby cocoon, hat, and booties for a penpal of mine that is 28 weeks pregnant. Hopefully I actually get around to doing it. First, I want to take a 30 min walk and then come inside and do Billy's Bootcamp. I better go do that before I talk myself out of it!
Toodles, Shan
Post a Comment