

YAY!! The dress is finished! However, we didn't get to go Easter egg hunting like we had planned. The weather was not cooperating with us.
I learned so much from this dress; a lot of do's and don'ts. I did pretty good with the measurements of my pattern. The dress bodice is sitting a little low because Grace was starting to go a little bonkers when I was tying the neck tie. The dress is a little longer than I wanted; only by a couple of inches, but that's an easy fix.
I miscalculated what the width of the satin ribbons should have been and was unable to fix that with this dress due to all my prior mistakes with the satin so I didn't have enough. But, also easy to fix with future projects.
Did I mention that I loathe satin. You may find I mention that fact often through this post. However, I have to show you my final steps, so, here it goes.
First, I prepared myself a cup of tea and some Lindt orange chocolate because I knew it was going to be a haul to get the dress done in one night. Doing this gave me an amazing idea, but I'll get into that later.
 |
| Trust me, I didn't just have two eensy-weensy pieces of orange chocolate. |
After I settled and resolved my mind to the final stretch, I did a review of my satin. This is where I had to cut four brand new, long pieces of satin.
After I made my cuts, I finally sat down to the sewing machine to bring it all home. First, I started on the neck straps. I had cut these at 2 1/2" so I could just fold it, sew it and turn it inside out. Here comes my first and second frustration. First, I miscalculated, as stated earlier, the final width needed. I thought the top of the bodice where the straps attach was going to be smaller - an inch wide. This wasn't the case. But, like I said, I had no more satin to be able to fix this so I knew I had to just go with it and make it look as good as possible.
Second, I hate satin. Seriously, it's was really causing me some problems. I love the end result, it adds a little more quality to the dress, which is why I chose it, but is was really difficult. Here are a couple of tips I quickly and unfortunately had to find out the hard way:
- When choosing satin, buy more than you think you will need. You are going to need it - well, unless you are a pro. But if you are a novice, buy more, at least a yard more.
- When sewing your satin, make sure you leave ample seam allowance, especially if you are sewing the satin by itself. This stuff frays like crazy and the frays get caught on the dog feeder and can just wreck the fabric.
- Use a zig-zag stitch. If you can't, use the smallest stitch length.
- When sewing satin alone change the needle to a lightweight needle. This is a must! The normal, medium weight needle is fine when attaching the satin to cotton, etc. Just go slow. Satin is a finicky little princess.
 |
| One of the neck ties |
 |
| I chose a very small length zig-zag stitch to help reduce runs and prevent future fraying. |
For the waist ties I chose to sew two pieces together and then turn them inside out. This worked out pretty good.
Next, came the longest part of my night - turning the satin pieces inside out to expose that satin sheen. I loathe satin.
 |
| This picture was taken prior to realizing how loooong this was going to take. |
So after doing the first neck tie by hand (this was 18" of pure....bliss) I knew I had to figure out something that would help me with the 36" pieces (these were the waist sashes and I only made them this long because I had a certain size bow in mind and I didn't know how long was long enough, thus the extreme length).
So, which of the following do you think I chose:

Well, I used them all and finally settled on the tweezers. The tweezers helped a lot! It was still an exhausting process and I will be purchasing a loop turner pronto!
So here's how it worked. I got the process started with my hand and then I would stick the tweezers in the end as far as it would go, get a good grip and since satin is silky, just slid the outside down the shaft as I held the tweezers firm.


Like I said, it worked pretty good. Took quite a bit of time of the whole process. When I would get to the end, it was hard to use the tweezers. However, as stated before, satin just slides so I used my fingers. With one hand holding the raw end, the other was using a thumb and forefinger action to coax the inside satin out.

This part was just soooo much fun!
When all the sashes were finished, they needed to be attached to the bodice. But first, the front bodice pieces needed to be sewn together, so I did that (it was already pinned where it needed to be because I had marked it earlier on Grace).
 |
| That stitch is going through both bodice pieces |
Then with the raw end of the sash poking out and the pattern side facing on the bodice front and bodice back , I sewed the side seam.
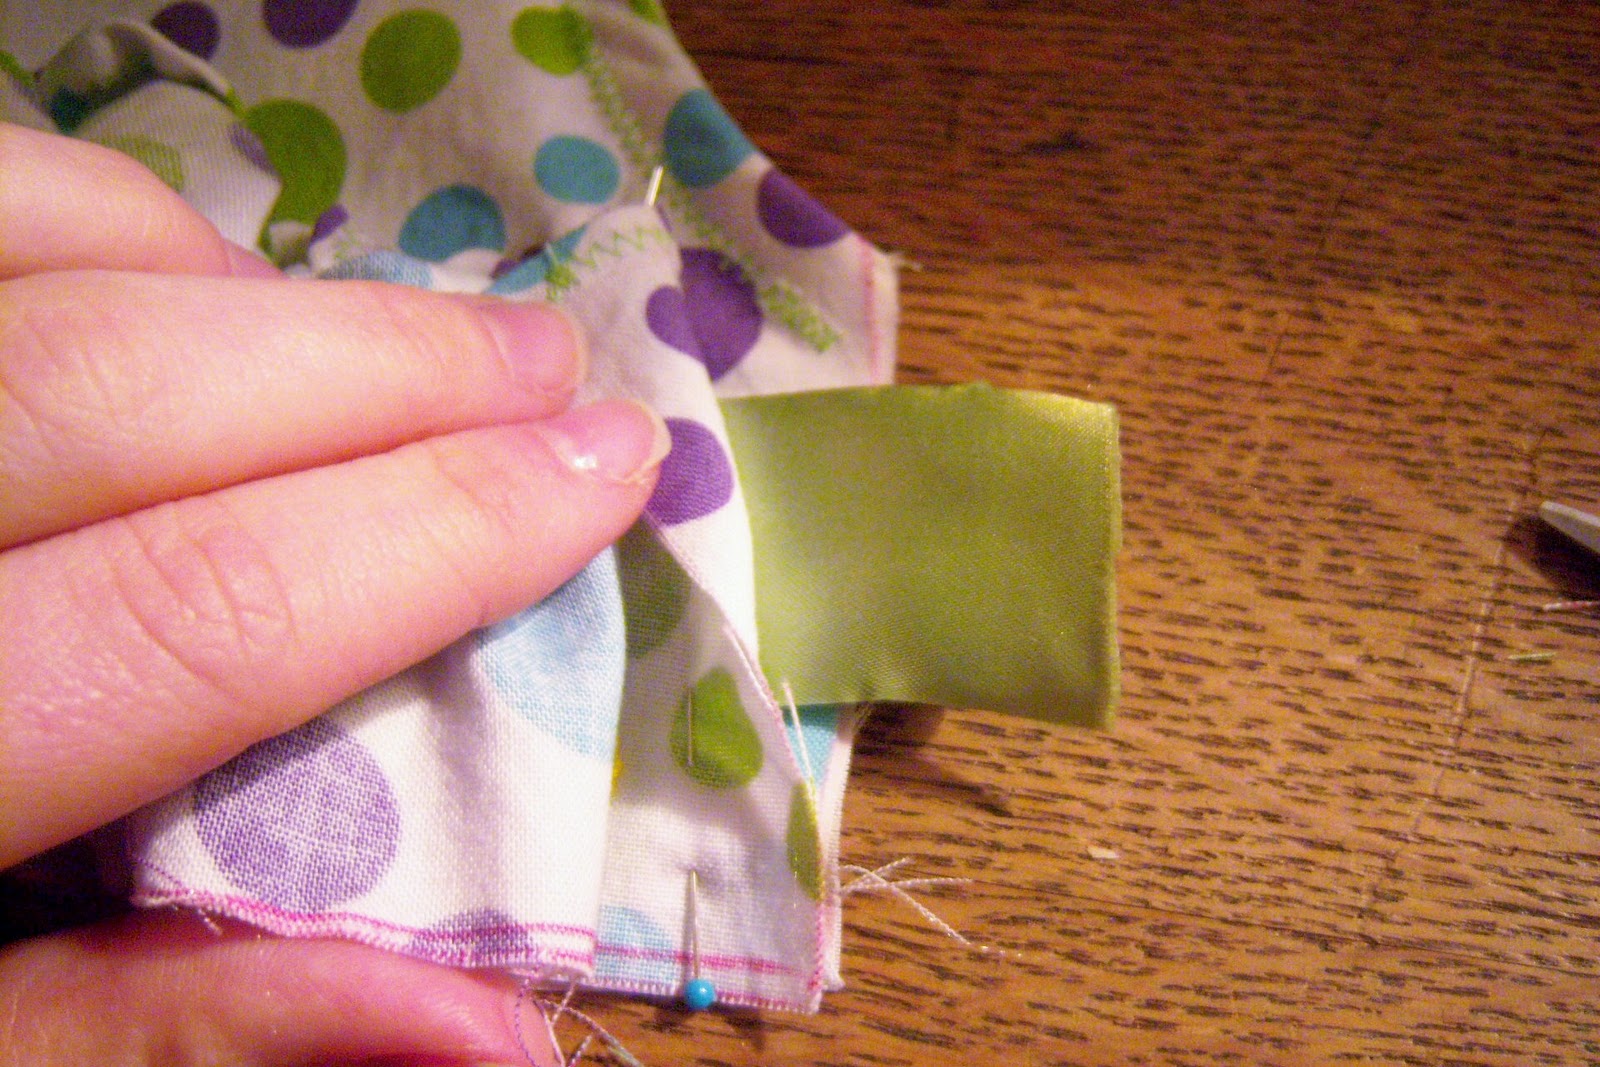
The result is a satin sash seamlessly coming out of the side seams. Next I folded down the raw top of the bodice for a clean look and attached the neck tie to the back. This was difficult because it was bulky and the first one wasn't as pretty as I had hoped. I switched to a heavy-weight needle for the other side. You can also see below that the ribbon wasn't wide enough. Just one of the few things that I will change for the next dress and future designs.

The only thing left to do was put on the bottom of the dress. I had decided to not make a casing for elastic on the bottom of the back bodice and just leave it because the ties would pull it together. This worked out fine and my theory was correct, but I think for the next dress, I'm going to make the casing. I can just now see how it would have looked and I want that for the next dress.
So for gathers, you just set your stitch settings to the longest length and lower your tension. Leave long strings on the ends and don't backstitch because you will pull the strings to gather the fabric.

Pin the fabric with printed sides facing and then sew, making sure to sew next to the gathering stitch at least a 1/4" or more to hide those gathering stitches.
And Viola! I was done!!! I was so happy. David was asleep on the couch and it was 12:30 in the morning but I was done!
And here is my beautiful daughter showing off her Easter dress that mommy designed and made for her - Daddy directing the photoshoot of course☺.


 |
| I forgot to iron the sashes. Whoops! |

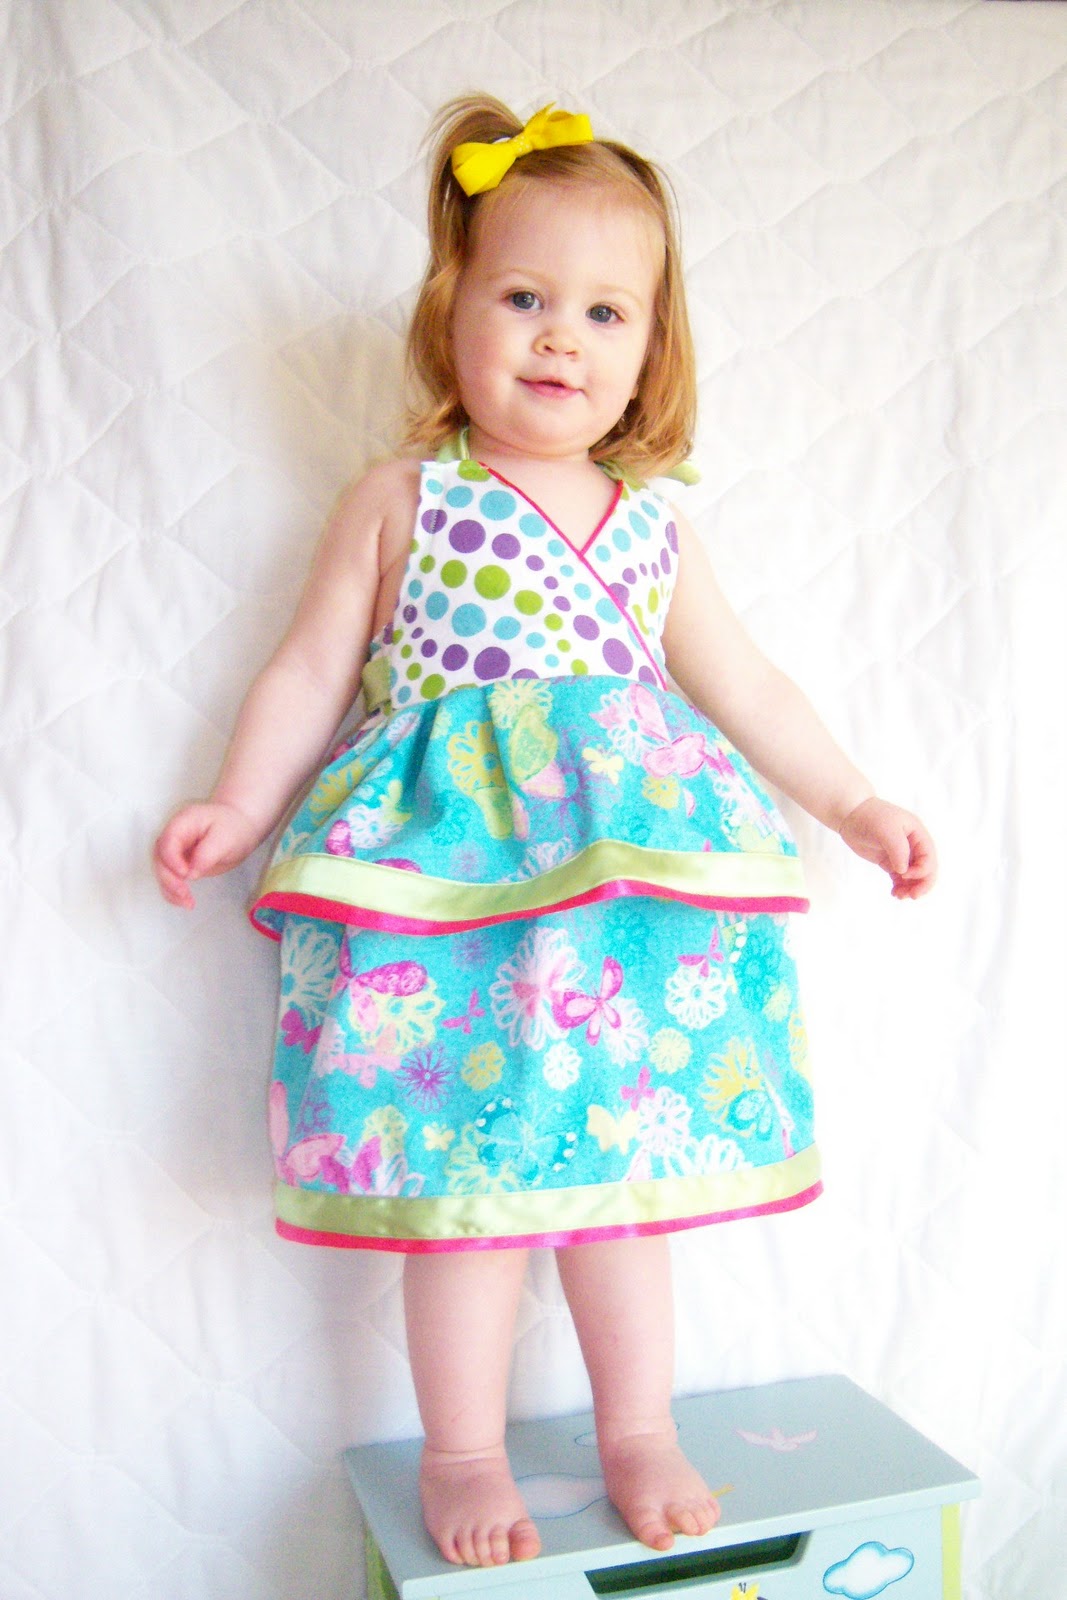
There it is! My first major pattern. Like I said, I learned a lot, but all of which is easily changed. I am so proud of myself. I can't believe I actually designed this dress, then created a pattern and sewed it all together and it fits my daughter great! She loved this dress. It's so bright and fun and she did a lot of twirls.
My family was so supportive and all encouragement that was given by friends and family went into this dress. So here is to my first finished project on my blog! May there be many, many more!
Speaking of more, that brings me back to the hot tea.

My next project will be tea cozies! Of course you can use them for any hot beverage in a mug but mine will be specifically for tea. I'm tired of the drab paper towel used to cover my cup while my steaming tea steeps. I'll be making quite a few so that I can give them to friends and family. This will be great as I decide whether I want to tackle another design for Grace or for my growing belly. I haven't decided the theme, but that will be coming so stay tuned!
Thanks again everybody!
4 comments:
Great job shanna it is perfect and so adorable you are so talented you always have been I love you
Darling dress! I love the bright colors in your fabric choices and the cute cross-over bodice. I hope you get the weather for an Easter egg hunt soon!
Thanks so much Anneliese! We are looking forward to some warm weather. I'll be creating Grace's Summer wardrobe soon so I hope you stop by again to check it out.
I love the fabric combo too. Why weren't there great clothes like this when I was a little girl?!
Post a Comment