Thursday, March 31, 2011

Easter Dress: Satin and Skirts

In my last post I talked about I made some mistakes and discoveries.  Well, one of my mistakes was that I didn't apply fusible interfacing to all of the satin strips of fabric.  And the discovery at that time was how much it helped to reduce puckering and wrinkles.  However, a few new discoveries have surfaced:

1)  I don't need the fusible interfacing if I fold it a certain way
2)  Don't apply wondertape if you don't plan on sewing that day, or my case, that night

After two days of not sewing, the tape didn't stick on certain parts and I couldn't just pull it off because it just shredded the edges of the satin.  Bummer.  Therefore, I had to cut new strips, which I promptly bought at rotary cutter and mat for because the satin and the scissors were not getting along and I was getting highly frustrated.

However, once I got past all my disappointments, I got down to business and actually got quite a bit done and still managed to get to bed by 12am!

To begin, I re-cut the satin strips for the dress skirt as I mentioned before.  This time, I cut it to 2 1/2" instead of 1 1/2".  I folded it in half and pressed it.  Then I folded and pressed up the two raw edges on one side to make a beautiful solid strip of satin.  I didn't take pictures because I had been in quite a state with all my disappointing discoveries.

I have two of these long strips.  One is 19" and the other is 21"

I then pressed a 1" hem on both of the dress skirts, pressed and then tucked in the raw edges and pressed again.  I was trying not to use the wondertape because I didn't have that much left so I wanted to make sure I had it when I really needed it - like for the next step!

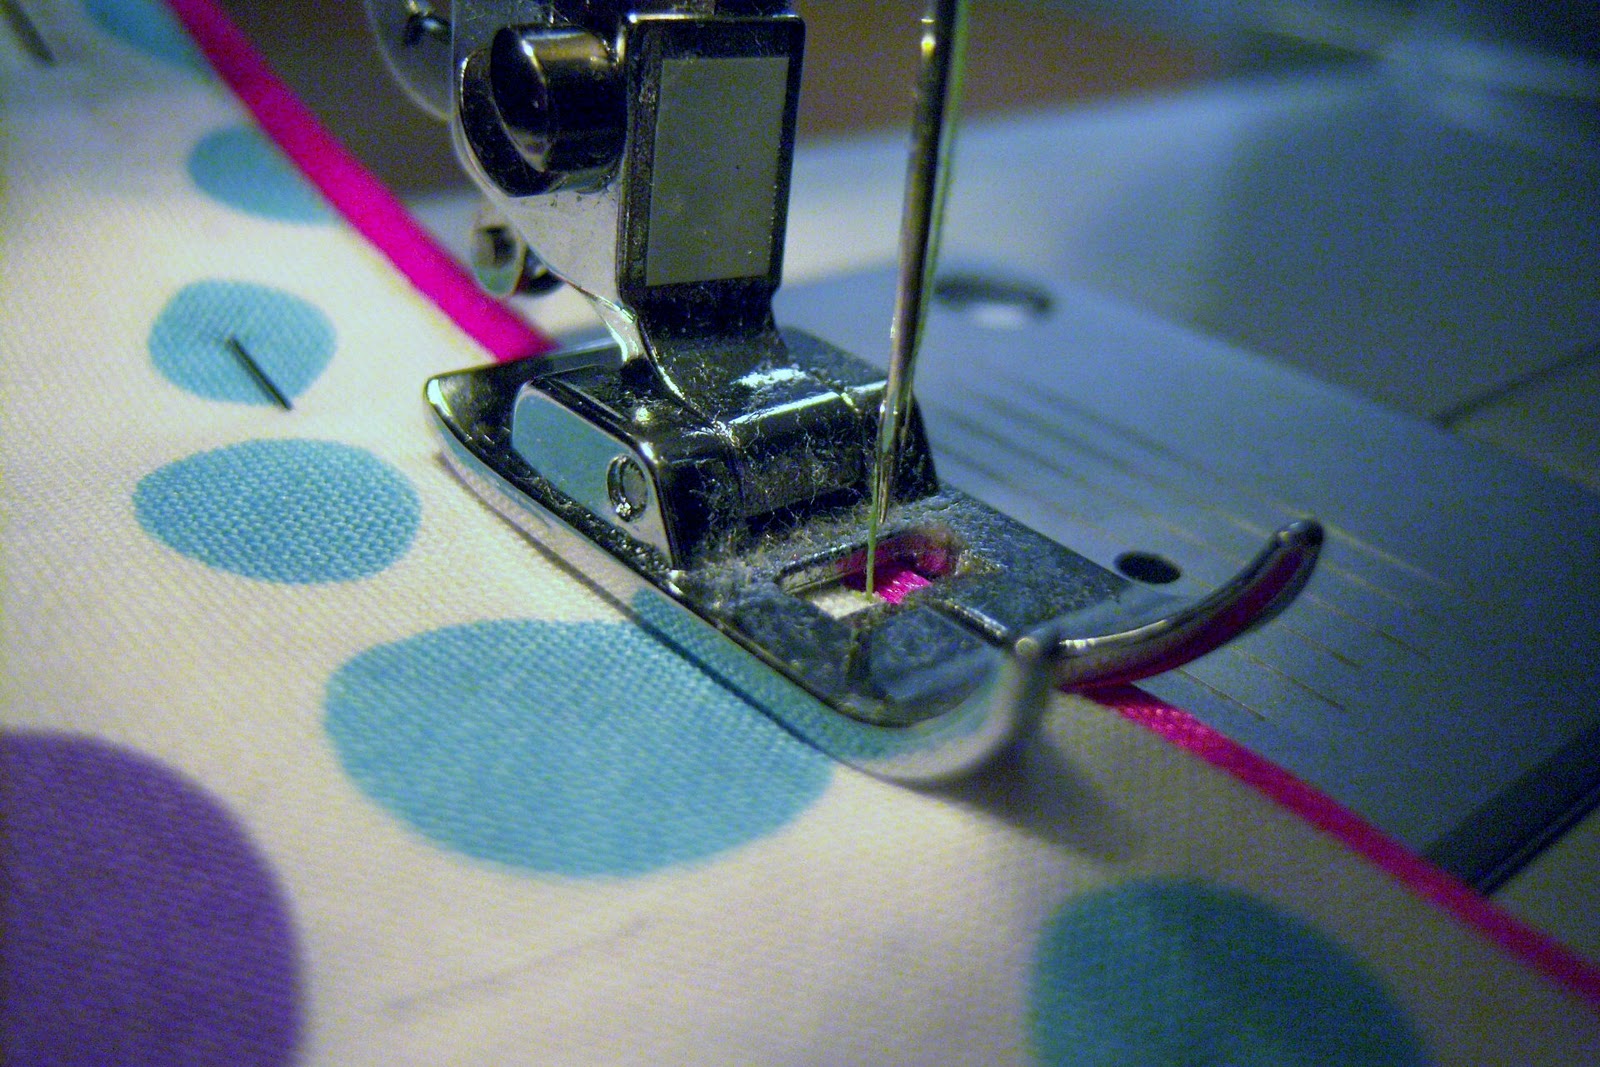
I applied wondertape to the back edge of the pink ribbon and adhered it to the skirt so as to hang over the edge about a 1/4".  I'm using 5/8" wide ribbon.  When I stitched I used my smallest length which reduced separation between the ribbon threads.


I really need to clean my Presser Foot - Satin makes it dusty!
  
Then I placed the bottom edge (folded raw edge) of the satin in the middle of the pink ribbon.  You can use wondertape here, but I just pinned it. 


I then stitched as close to the edge as humanly possible with my pretty green thread.  Again, I used the lowest stitch length.


I then did the same for the top of the satin ribbon as you can see below...


Lookin' Good!!!

Next, I zig-zag stitched the side edges of the skirts...


Two more discoveries at this point:

1)  I really like the green thread on this fabric - I had bought blue, but it won't be used now.
2)  I think I'm going to use zig-zag stitches for some of my "seen" stitches.

So this is when, my brain gets a little funky.  Instead of stitching my skirt seams together and getting ready for gathers, I kind of go brain dead and forget what my plan was for the back of the bodice and the skirt.  I won't go into the details but this was obviously my brains way of telling me "Hey, dummy, you are going to make this way much harder than it needs to be!"

So I took this opportunity to indulge my pregnant self and eat some left over carrot cake from a local restaurant my mother-in-law and I visited for lunch. 


Carrot cake, cold milk, and the best part, Grace was sleeping so I didn't have to share!!!!!  I still had David, and I offered, but I gave him the look that basically said, "If you know what's good for you, you will not take me up on my offer."
  So after skipping a few beats and eating some very tasty carrot cake with cold milk, my brain kicked back in and I started working again.  I still didn't do the skirt seams, but I started on the bodice.

First, I sewed the long seam very close to the edge with a straight stitch, in green, and on the lowest length.


As you can see, I lied.  However, I'm sure you will forgive me.  For the arm hole, I stitched the bias tape to the pattern side, like normal and then folded it over and used my zig-zag stitch to secure it on the backside.  Presto!

Almost done.  I told you, I got quite a bit done last night. 

Next I looked at the back of the bodice fabric and decided to try something that I saw on a pair of my favorite bloomers that Grace wears.  The elastic is not housed in a casing.  It is actually stitched right onto the fabric.  So, I thought I would give it a whirl seeing as I have so much of this polka dotted fabric that I could spare to cut another piece should I completely screw it up.  But I didn't!!!

It wasn't that hard.  I cut about 9 1/4" of baby elastic.  I then sewed just a little of the top (unstretched) to the beginning of the fabric with a zig-zag stitch to insure that I grabbed the elastic and the fabric.  Then, when I knew I had a secure hold, I began to stretch the elastic.  I stretched it all the way to the other edge of the back bodice, which measured 4"x15", and stitched all the way down.  I'm on the long side of course.


This is how it looks on the opposite side.  Perfect!

I really like how that elastic worked out because I didn't cut the pattern large enough for a casing.  One of the errors that I'm finding with making my own pattern.

Next on the list:

1) Stitch skirts together
2) Gather skirts together
3) Shoulder straps and waist ties - I need a loop turner - plus attach them
4) Stitch front and back bodice together - including stitching the front bodice itself together
5) Attach skirt to bodice

Then I should be done...except, the weather for Sunday is supposed to be 66 degrees!!!  I think I am going to need a jacket of some kind.  I don't think I have enough time to make one.  Maybe a shawl/cape type thing...my brain will be working tonight.

Monday, March 28, 2011

Easter Dress: Bodice and Wonder Tape!

So, I started last night on putting some of the pieces together for the darling little dress I'm making Grace for Easter.  I had already cut the pieces, which is a task I never look forward too - I don't have a proper place to do it except on the floor - not easy when pregnant!

Before I begin laying it all out for you, take a look below at the preliminary sketches to get an idea of what the dress will look like once constructed.

Bottom of dress should come just below knee - well, that's the goal!
And, I won't be using bias tape.  I need some pink!


Fabric Selections
Top two are HG cottons and bottom is a beautiful Poly Satin for trim

So I had bought some ribbon that was going to be really cute, but it wound up being too stiff to gather correctly.  Remember, I'm new to sewing!  Lots of mistakes are in my future.

So I'm beginning with the bodice as a lot of it can be put together with this amazing stuff called Wonder Tape.  I found it by looking at other blogs and they kept mentioning it's magical powers so I decided to give it a whirl.  WOW!!!!  It's going to make a ton of difference in my construction.  The great thing about it is, unlike other fusible tapes (which you need an iron for), this is a double stick adhesive, you can sew through it and it won't gum your needle and, AND!!!  It's water soluble so it's gone after one wash.  It's amazing!

So, first, I applied Lightweight Fusible Interfacing to the back of the two bodice pieces.  You can find fusible interfacing at pretty much any fabric store and can buy by the bolt too (way more expensive).  There are different kinds and weights, but not too many that you get crazy confused.  Just follow the manufacturer's directions when applying.  It's easy and I love it, especially for cottons.  It just gives a little support where you need it.

Next I needed to create a 1/4" seam on the long side of each front bodice.  I just applied the wonder tape and since it is perfectly a 1/4", it made for an easy seam!


Look at those clean lines!!!

Next, I applied wonder tape to the edge of some satin ribbon that was 5/8" wide and folded edge to edge.  This tape is probably going to help again because the ribbon is delicate and can really mess up when sewn alone.


Just peel off backing of tape and fold to edge

I then applied the tape to the back of the bodice on the long edge again and just stuck the ribbon on, edges facing inward.

I'm kind of...kind of, mimicking the look of piping...again, kind of.


And for the backing, which I need because:

1)  It will provide another anchor for the ribbon and will "house" the satin shoulder straps (in another post)

2)  The cotton's white part, isn't so white when alone and I thought the fusible interfacing might suffice, but it just needs another boost so we are using an old white sheet for the backing.  Very soft and thin.

And, 3)  It will just look so much more finished!

So I just did exactly the same thing for the backing as I did for the bodice, except for of course the seams will be facing.  However, I didn't use tape to hold it to the seam, I just pinned it.


The end result of this was something that was looking way cleaner than I could have hoped for had I not used the Wonder Tape.

I did more after this with the Poly Satin, but didn't take pictures because I made some mistakes and also made some discoveries.  Therefore, I'm probably going to have to cut more of the Poly Satin so it can look as good as I discovered it could....is that cryptic enough! 

So that will be my next post:  Mistakes and Discoveries on Polyester Satin.  I think it could make a great book!

And this is perfect timing to wrap this up because Grace just woke up!

Saturday, March 26, 2011

Easter Dress

I just cut the pattern for Grace's Easter dress.  It was a tricky cut as the bodice is two pieces that cross over one another to form a "V".  I'll be posting pictures of my drawings of the design as well as my fabric choices tomorrow. 

Also, just a tip.  When measuring a baby, wait when they are tired and relaxed.  I put Grace on her changing table at nap time and was able to get every single measurement that I needed.  And then tonight, I measured her again just before bed time to get some other odd little measurements...which I didn't even use. 

This pattern making is just like a giant puzzle and I find myself constructing clothing in my sleep!  I have also run into a little hickup as my ribbon that I was going to use as a gathered embellishment is just too stiff and too thin.  I won't be able to sew it onto or into anything.  I guess I'll be trying to figure that out tonight in my sleep!

Wednesday, March 23, 2011

First of Many...

Today is my first official post.  Congrats to me!  I'll be sharing all the clothing I design and sew, designs I create and print and anything else that strikes my creative fancy.  Stay tuned!
Related Posts Plugin for WordPress, Blogger...